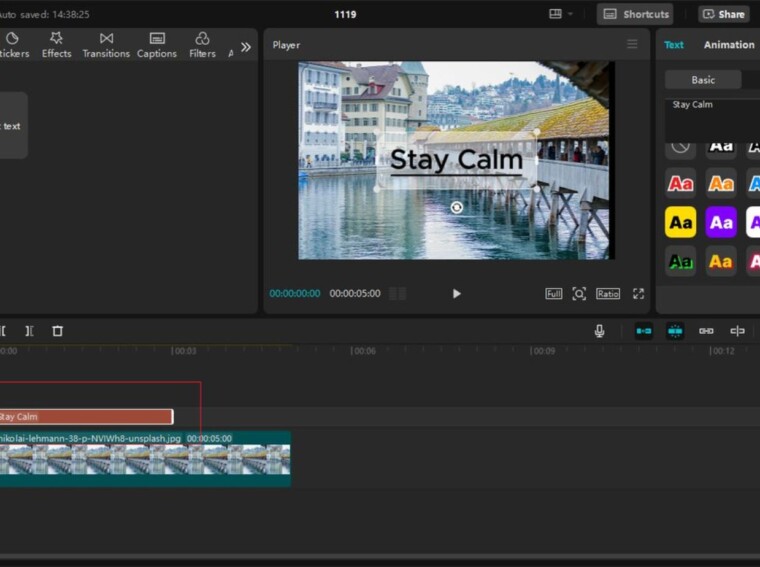
Animated text is more than just words on a screen; it’s a visual storyteller that amplifies engagement and captures attention. In video editing, using animated text in a particular sequence is one of the best ways to make the most out of it. Whether you are introducing a new video, teaching your audience something new in a tutorial, or simply promoting your posts on social networks, animated titles help convey information in a way that’s both dynamic and memorable.
The simplicity of the user interface and an advanced set of animation features make CapCut Desktop Video Editor a true all-in-one tool for your visuals As text movements, various fonts, and effects become integrated into the video, it becomes possible to produce not only informative content but also impressive visuals. Dive into this guide to explore how this video editor for pc can help you master animated text with creative examples for every step.
Step 1: Adding Text to Your Timeline
First of all, open the CapCut app and add your video to the timeline. Go to the “Text” tab and then to the “Add text” box menu where you can choose “Text” style. You can type here your desired message to be shown on the screen and place the mouse pointer where you wish it to appear.
For instance, imagine creating a travel vlog: You can just reveal each destination with the help of some pop-up text like “Welcome to Bali” and it will bring you right there. As for the font, use a simple text layout to avoid confusion and, for the colors, choose those that correlate with the atmosphere set in the video.
Step 2: Choosing Animation Styles
In CapCut, there are many types of preset animations available with basic transitions, such as fades, to energetic movements. After typing text click on the “Animation” option available on the top of the screen and explore available features.
For instance, if you are working with a recipe video then a “Typewriter” animation will be great for your list of ingredients as it will give a nice touch to the video. You can also combine subtle movement with timing adjustments for professional results.
Step 3: Customising Font and Style
To make your text stand out, try a custom caption generator or auto-caption your narration. There are many fun customized text styles, colors, sizes, and outlines available to make your text pop.
When posting a fitness tutorial, you should use a very energetic font, like Impact or Bebas Neue; for lifestyle content, softer fonts will do. Gradient colors or shadow effects should be applied to make the text readable against the background patterns. For instance, place white text with a black shadow when describing exercises over the bright backgrounds of a gym.
Step 4: Adding Motion Paths
The motion path enables the placing of text that can move across the screen, making the visuals more dynamic. To do this in CapCut, select the “Keyframe” option by which you can set the starting and ending positions of the text.
In the case of a corporate presentation, when showing the result of the analysis, such as “Sales Up 25%”, you might animate the text and make it slide in from the side to capture the attention of the viewer.
Step 5: Enhancing with Special Effects
CapCut allows you to add effects such as glow text, sparkles, or glitch movement. For example, in an electronic music promo, it is possible to create a powerful rhythm using two beats and add pulsing letters to the same rhythm. Try out some effects such as “Neon” or “Glitch” depending on the mood of the video.
Step 6: Synchronising Text with Audio
Perfectly timed text can make your videos more impactful. CapCut has audio waveforms, allowing for the precise alignment of text animations with sound effects or dialogue.
Like, when creating a cinematic trailer animate “Coming Soon” to fade in at the same time when the music hits the climax for a professional touch. If you find this difficult, then you can just type text by using text-to-speech AI.
Step 7: Layering Multiple Texts
Text in CapCut can be overlaid, and you can put multiple layers to achieve sophisticated animations. It is useful for placing multiple-line intros or highlighting key terms. In case it is a motivational video, write ‘Dream Big’ in the capital, big letters in the center whereas phrases like ‘Believe’ or ‘Achieve’ in smaller fonts but contrast color within the circle around ‘Dream Big.’
Step 8: Exporting and Sharing
When done, preview your video before and export the final copy in high definition. You also need to know that when exporting your animations through CapCut, your videos will retain their quality on any social media platform, be it Instagram, YouTube, or TikTok. For example, make a cool scene where the words ‘Thanks for Watching!’ appear in 1080p for a professional look.
Conclusion
CapCut Desktop comes equipped with various animated text tools, so creating engaging and captivating content from the video has never been simpler. From stylish intros to perfectly synced titles, these tools let you engage viewers with creativity and professionalism. Start experimenting today to make every frame unforgettable!
